Using the Brush Tools in Adobe Illustrator CS5
Most people assume that if you're using brushes in Adobe Illustrator, you must be creating "art." While this is true sometimes, you can also use brushes in production techniques to save time. I use brushes for many kinds of artwork, including drawing zippers, shirt collars, picket fences, and many other features.
Illustrator comes with five different types of brushes (calligraphic, scatter, art, bristle, and pattern) that reflect the breadth and depth of the results that brushes can achieve. In this article, we'll focus on two types of brushes that I use with a lot of my production techniques: art brushes and pattern brushes.
In this article, I'll cover the following:
- Creating art brushes
- Creating pattern brushes
- Brush techniques
Creating Art Brushes
Art brushes are a special animal, misunderstood by most people. You create some artwork, save it as an art brush, and then apply that brush to a path or shape. The art you created is stretched around the path or perimeter of the shape—usually with tragic results.
Figure 1 shows a wonderful example of an art brush applied to a square. I found this art brush by clicking the Brush Libraries Menu button in the lower-left corner of the Brushes panel and choosing Decorative > Decorative_Banners and Seals. I also changed the Stroke Weight of the path to .5 pt in the control panel.

Figure 1 An art brush applied to a square.
Let's create an art brush by using existing artwork:
- With a document open, expand the Brushes panel (see Figure 2). Click the Brush Libraries Menu button in the lower-left corner of the Brushes panel and choose Decorative > Decorative_Text Dividers. Drag one of the banners from the list onto the artboard. (As Figure 3 shows, I chose the "Text Divider 20" banner.) A great feature is that once most brushes are made, you can get back the original artwork!
- Make some changes to the artwork; for example, alter the color, or something like that.
- To create your new art brush, select all of the artwork on the artboard.
- Click the New Brush button to make a brush from the selected artwork. In the New Brush dialog box, select Art Brush and click OK (see Figure 4).
- In the Art Brush Options dialog box, you can set tons of options. For this example, select Stretch Between Guides, as shown in Figure 5. This great feature, new in CS5, allows you to tell Illustrator what to "stretch" (repeat) around the shape. Dotted lines appear in the preview window in the dialog box. Drag them close to each other. The part of the artwork between the dotted lines is what Illustrator "stretches" (repeats).
- In the Colorization section of the dialog box, choose Tints and Shades from the Method pop-up list. This feature allows you to colorize the brush after applying it to some artwork.
- When you're done making your selections in the Art Brush Options dialog box, click OK. Your new brush is saved in the Brushes panel.
- Create a circle, line, or other shape and apply the new art brush by selecting it in the Brushes panel or from the control panel (see Figure 6).

Figure 2 The Brushes panel in Illustrator.

Figure 3 Dragging brush artwork onto the artboard.
Figure 4 The New Brush dialog box.

Figure 5 Editing the options for the new art brush.

Figure 6 Applying the art brush.
To edit your new art brush, double-click it in the Brushes panel. If you want to edit properties for the brush when it's applied to an object (and only that object), select the object on the artboard, and then click the Options of Selected Object button at the bottom of the Brushes panel.
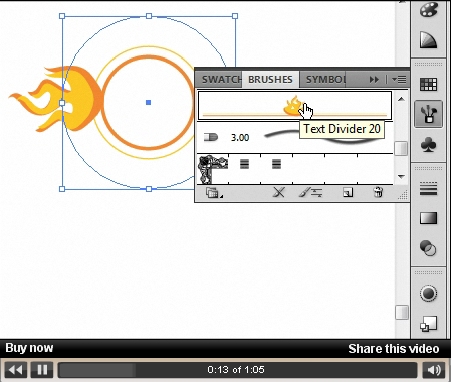
Do you want to update the brush you just made—that is, change the artwork? Easy! Video 1 shows the process in action. To do it on your own, follow these steps:
- Drag the brush from the Brushes panel onto a blank area of the artboard. This will give you the original art for the art brush.
- Make the changes you want in the artwork (color, transparency, or whatever).
- Hold down the Alt key (Windows) or Option key (Mac) and drag the revised artwork on top of the brush in the Brushes panel.
- When a line (highlight) appears around the brush, release the mouse button and then the Alt/Option key.
- Click OK in the Art Brush Options dialog box.
- If a dialog box appears, asking if you want to update the artwork on the artboard, click Apply To Strokes to update the artwork that's using the brush on the artboard. Once you get the hang of it, it's no big deal to update a brush.
 Optional content (will be overwritten by Flash movie)
You need to upgrade your Flash Player. You need version 9 or above to view this video. You may download it here. You may also see this message if you have JavaScript turned off. If this is the case, please enable JavaScript and reload the page.
Video 1