Using Markers in Adobe Premiere Pro CS6
Note: This excerpt is from the forthcoming book Adobe Premiere Pro CS6 Classroom in a Book, ISBN 978-0-321-82247-5.
Sometimes it can be difficult to remember where you saw that useful shot or what you intended to do with it. Wouldn’t it be useful if you could mark clips with comments and flag up areas of interest for later?
Markers allows you to identify specific times in clips and sequences, and add comments to them. These temporal (time-based) markers are a fantastic aid to help you stay organized, and share your intentions with co-editors.
You can use markers for personal reference or for collaboration. They can be based on clips or on the Timeline.
When you add a marker to a clip, it is included in the metadata for the original media file. This means, you can open the clip in another Premiere Pro project and see the same markers.
For this exercise, open Lesson 06-02.prproj in the Lesson 06 folder.
Types of Markers
There is more than one type of marker available:
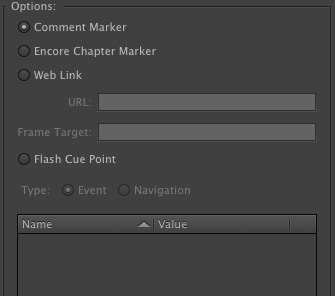
• Marker: A general marker you can assign a name, duration, and comments.
• Encore Chapter Marker: A special kind of marker that Adobe Encore can convert into a regular Chapter Marker when making a DVD or Blu-ray disc.
• Web Link: A special kind of marker that supported video formats like QuickTime can use to automatically open a web page while the video plays. When you export your sequence to create a supported format, Web Link markers are included in the file.
• Flash Cue Point: A marker used by Adobe Flash. By adding these Cue points to the Timeline in Premiere Pro, you can begin to prepare your Flash project while still editing your sequence.
Sequence Markers
Let’s add some markers to our Double Identity sequence.
1 If it isn’t open on the Timeline already, open the Double Identity sequence in the Sequences bin.
At approximately 4 seconds into the sequence, we can hear the director tell the actress to “turn back.” Let’s leave a marker as a reminder to remove that audio.
2 Set the Timeline playhead to the moment where the director speaks, around 00:00:03:22.
3 Click the Add Marker button on the Timeline.
A green marker is added to the Timeline, just above the playhead. You can use this as a simple visual reminder, or go into the settings and change it into a different kind of marker.
We’ll do that in a moment, but first let’s look at this marker in the Markers panel.
4 Open the Markers panel. By default, this is grouped with the Project panel. If you don’t see it there, go to the Window menu and choose Markers.
TipYou may need to click on the Timeline panel to make it active before your current Timeline markers are shown in the Markers panel.
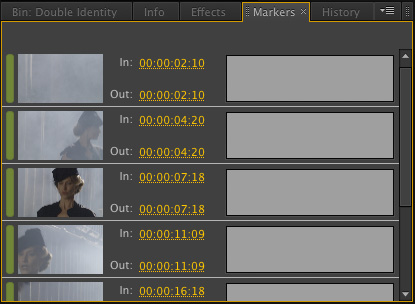
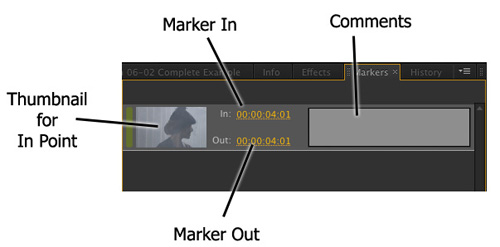
The Markers panel shows you a list of markers, displayed in time order. The same panel shows you markers for a sequence or for a clip, depending on whether the Timeline panel or the Source monitor is active.
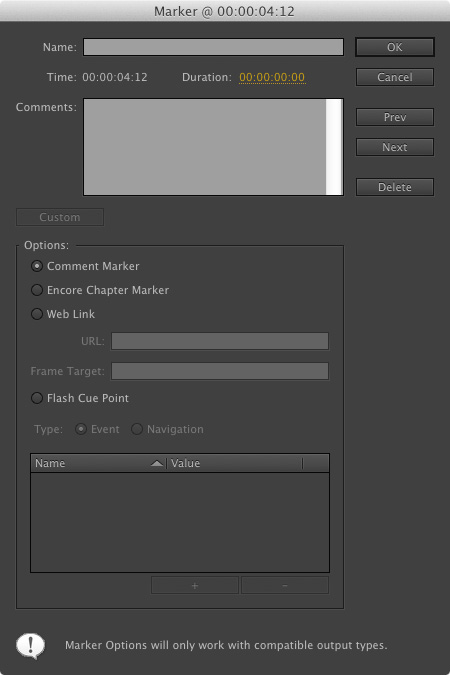
5 Double-click on the thumbnail for the marker in the Markers panel. This displays the Marker panel.
6 Click on the Duration and type 400.
7 Click into the Comments box and type a comment, such as Check the sound. Then click OK.
Notice that the marker now has a duration on the Timeline and, if you zoom in a little, you can see the comment you added. It’s also displayed in the Markers panel.
TipNotice that the entries in the Marker menu all have keyboard shortcuts. Working with markers using the keyboard is generally much faster than using the mouse.
Clip Markers
Let’s look at markers on a clip.
1 Open the clip Seattle_Skyline.mov in the Source monitor.
2 Play the clip, and while it plays, press the M key several times to add markers.
3 Look in the Markers panel. Every marker you added is listed. When clips with markers are added to a sequence, they retain their markers.
NoteMarkers can be added using a button or a keyboard shortcut. If you use the keyboard shortcut, it’s easy to add markers that match the beat of your music, as you can add them during playback.
TipYou can use markers to quickly navigate your clips and sequences. If you double-click on a marker, you’ll access the options for that marker. If you single-click on it instead, Premiere Pro will take the playhead to the location of the marker—a fast way to find your way around.
4 Make sure the Source monitor is active by clicking on it. Go to the Premiere Pro Marker menu and choose Clear All Markers. Premiere Pro removes all the markers from the clip in the Source panel.
TipYou can get to the same option to remove all markers—or a current marker—by right-clicking in the Source monitor or on the Timeline and choosing Clear All Markers.
Interactive Markers
Adding an Interactive marker is as easy as adding a regular marker:
1 Position the playhead anywhere you would like a marker on the Timeline and click on the Add Marker button or press M. Premiere Pro adds a regular marker.
2 Double-click on the marker you have added, either on the Timeline or in the Markers panel.
3 Change the marker type to Flash Cue Point and add the Name and Value details you need by clicking on the + button at the bottom of the Marker panel.
Note: This lesson continues in the forthcoming book Adobe Premiere Pro CS6 Classroom in a Book, ISBN 978-0-321-82247-5


