Stabilizing Footage with the Warp Stabilizer in Adobe Premiere Pro CS6
Note: This excerpt is from the forthcoming book Adobe Creative Suite CS6 Production Premium Classroom in a Book, ISBN 978-0-321-83268-9.
A common issue that occurs with footage recorded on handheld cameras is that it can be shaky and uneven, making it difficult to watch. The Warp Stabilizer, introduced in Adobe After Effects CS5.5 and now available in Adobe Premiere Pro CS6, is an incredibly advanced stabilization tool that can make this type of footage look as if it was recorded with a sophisticated camera rig.
What makes the Warp Stabilizer so unique is that you generally don’t need to change any of the default settings to get a good result. The advanced image analysis, which takes place behind the scenes in Premiere Pro does all the heavy lifting for you.
Stabilize a shot
1 In the Project panel, select the Warp Stabilizer bin.
2 Double-click the Warp Stabilizer sequence to open it in the Timeline panel.
3 Play the sequence.
Notice that about halfway through the clip there is a considerable amount of camera shake, which would ordinarily make this shot unusable.
4 Press Shift+7 to make the Effects panel active.
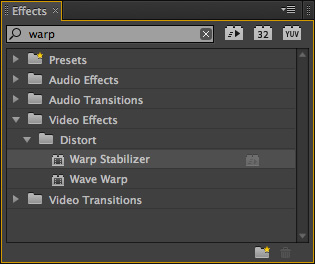
5 Type warp in the Rapid Find box to quickly locate the Warp Stabilizer effect.
6 Select the clip in the timeline, and then double-click the Warp Stabilizer effect to apply it.
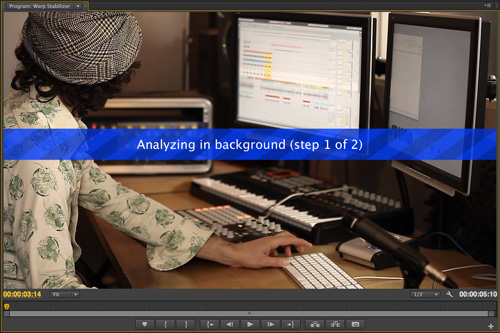
The Warp Stabilizer effect immediately starts analyzing the clip, and a blue bar across the image in the Program Monitor indicates that the clip is being analyzed.
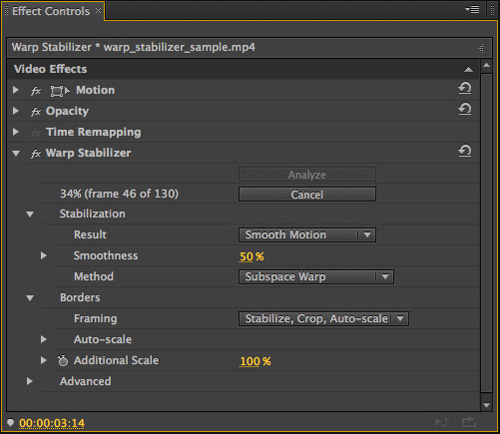
7 Press Shift+5 to open the Effect Controls panel.
Clip analysis progress, in number of frames and percentage, is displayed in the Effect Controls panel. Once the analysis process is complete, an orange bar appears across the image, indicating that it is being stabilized. This process continues automatically in the background, allowing you to continue working on other tasks in Premiere Pro.
8 When the stabilization process is complete, play the clip.
Notice how the camera shake is now completely gone, and the pan from right to left at the end of the shot is smooth and fluid, as if the camera had been mounted on a tripod with a high-quality head.
In many cases, such as this one, you do not have to change any of the default settings in the Warp Stabilizer effect to get a good result. For more problematic footage, you can use the controls in the Warp Stabilizer effect’s Advanced section to crop less or smooth more to get desirable results.
Note: This lesson continues in the forthcoming book Adobe Creative Suite CS6 Production Premium Classroom in a Book, ISBN 978-0-321-83268-9


